

If you have used or administered NetSuite for any period of time, you may be familiar with the Mass Update feature. This powerful feature allows users to perform updates and changes to data in mass, using the many per-built updates readily available and with minimal configuration.
However, sometimes there are specific scenarios where there may not be a pre-built mass update available for a specific task. In today’s example, we will cover how to perform a mass update by creating our own custom mass update.
In this example, we are going to assume that a number of unapproved journal entries have been imported into the system in error. Because of the large number of journal entries imported, our task is to clean up and remove the transaction in question as quickly as possible.
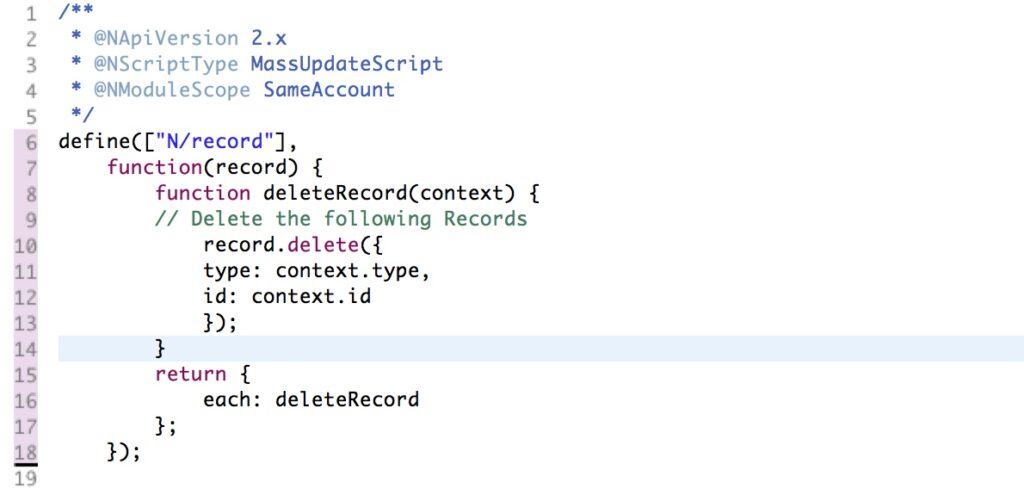
Step 1
In step 1 we create a simple SuiteScript 2.0 that will process the returned transaction records that we pass to it. In our SuiteScript below, we are looking specifically for the type of transaction “context.type”, and the transaction id “context.id.” Once we have this information, we can then process the record, in this case, delete the record.
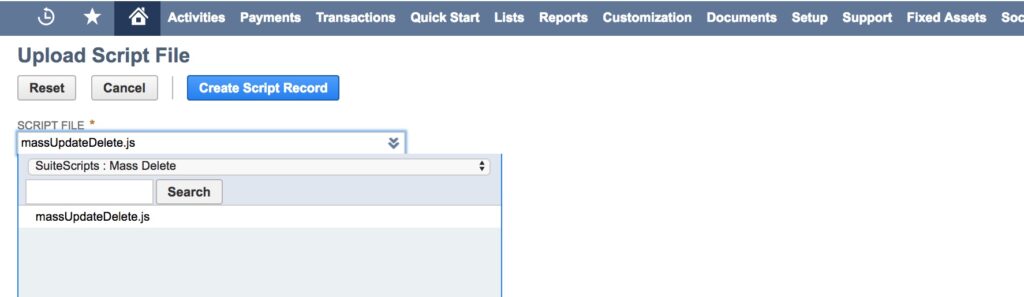
Step 2a
Once we’ve uploaded the SuiteScript to the documents folder in NetSuite, we can then locate it and proceed to create our Script Record.
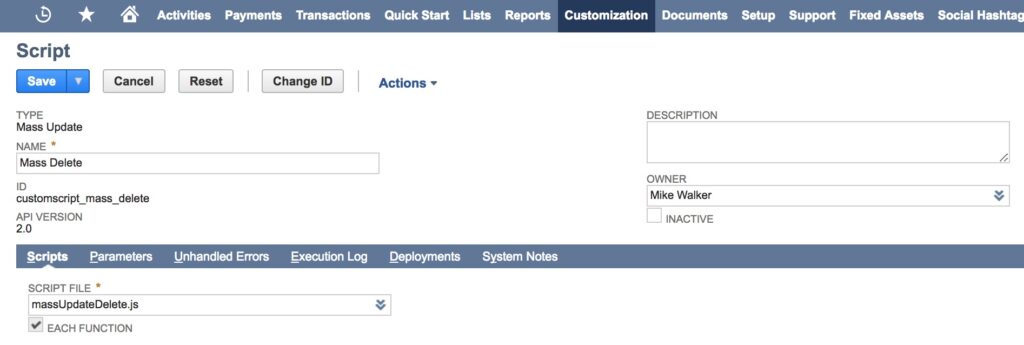
Step 2b
Be sure to select “Mass Update” as the script type and then provide a name our new Mass Update script.
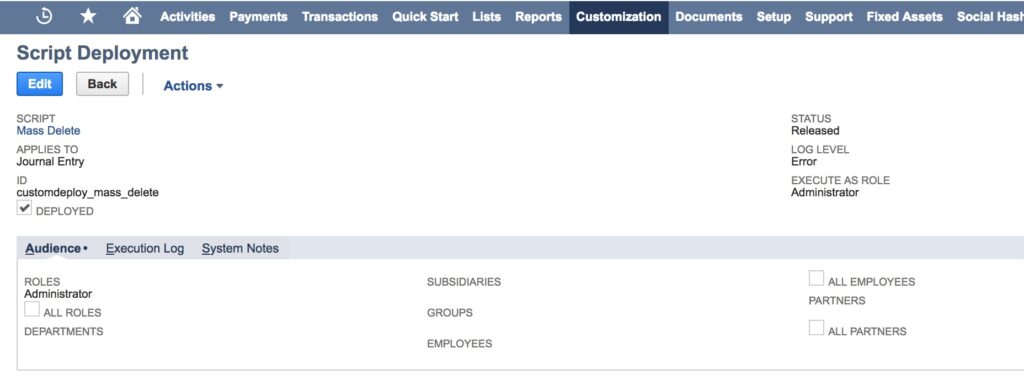
Step 3
Let’s create our deployment record for our newly-created Mass Update script. It is imperative to select “Journal Entry” from the Applies To field List of values. Also note that this same script created in Step 2a and Step 2b above, may be used multiple times on different record, simply by creating another unique deployment record and selecting a different record from the Applies To list of values.
Step 4
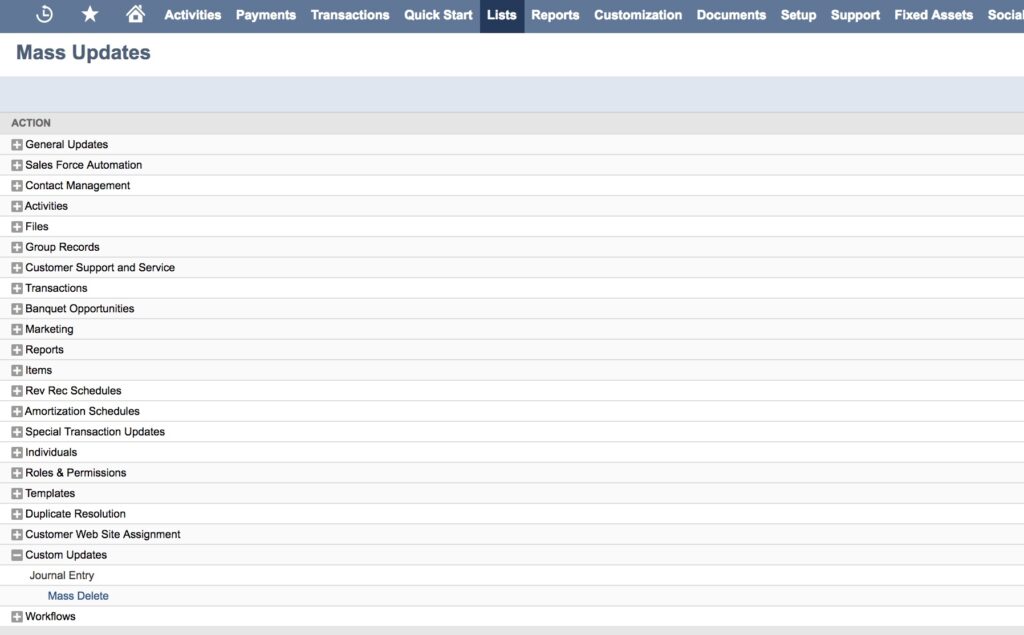
Now that the deployment record has been created and assigned to the Journal Entry transaction type, lets navigate over to the Mass Updates, and view our custom update. This is found under Custom Updates > Journal Entry and our newly-created mass update is Mass Delete. Go ahead and click on the link.
Step 5
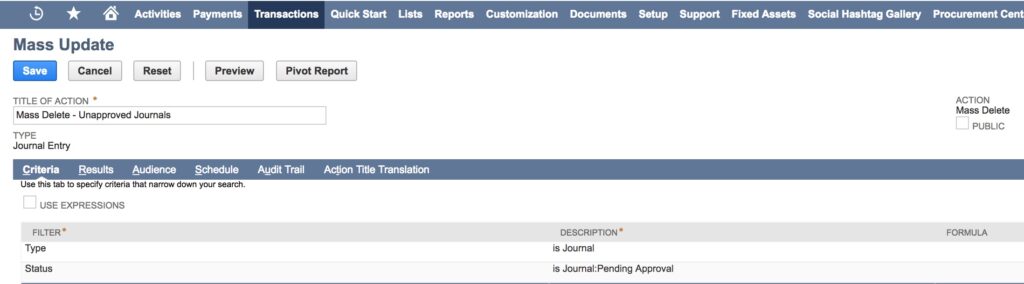
Create the Mass Update search by providing a meaningful name. Under criteria, let’s select “Type” and set it to “is Journal” and let’s also select “Status” and set it to “is Journal:Pending Approval.” We want to be sure NOT to return any Journal Entry records with the Status Approved! When ready, click on the “Preview” button. You should also “Save” you search at this time as well.
Step 6
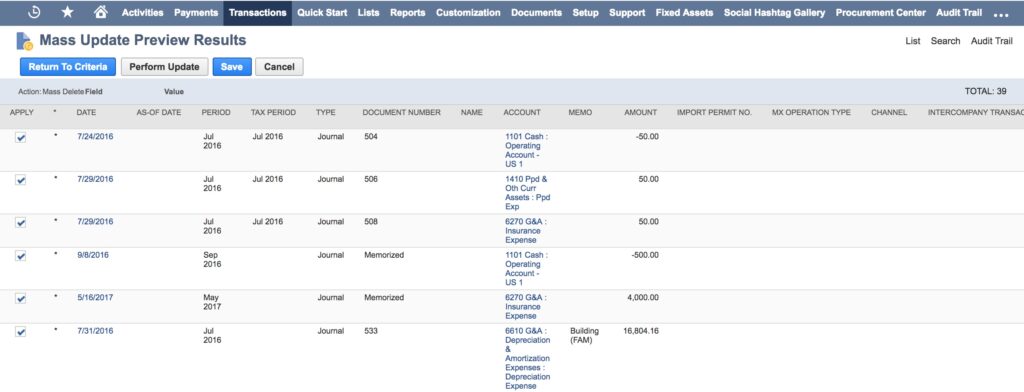
Our final set is to review the returned records. If they are the desired results, we can check off each that apply (or apply all) and continue by clicking the “Preform Update” button. At this point in time, each individual record is passed to the script we create in Step 1 above to be processed, in our case, deleted.
If we can be of any assistance in the creation of custom mass updates as shown above, or with any other area of your NetSuite environment, our NetSuite consulting team can help. We have 15 years of NetSuite experience, and more than 25 years of experience implementing ERP solutions.
Please contact us at info@67.solutions or by phone at 647-631-2528.


