

I have often times come across clients who have migrated their trial balances without assigning a customer or vendor to the name column/field on Journal Entry lines that impact Accounts Receivable and/or Accounts Payable accounts. This will always result in a balance showing at the top of the Aging Report with “No Customer” or “No Vendor” assigned to the amount.
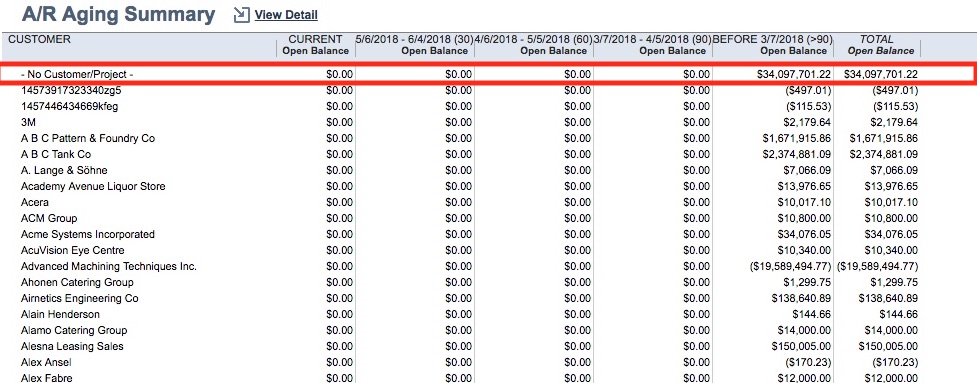
One must also note, once the accounting period has been closed you can no longer assign a customer or vendor to the name column/field on the Journal Entry line and without a customer or vendor assigned, you may never be able to close out the amount and prevent it from appearing.
Quick Fix Approach
A quick method to hide any amounts assigned to either “No Customer” or “No Vendor” is to edit the Aging Report by filtering out any entries with “No Name” assigned to the name column/field. This will hide the entries and the amounts will no longer be displayed on your newly created Aging Reports.
However, by customizing the Aging Reports to hide transaction with no customer or vendor assigned to the name column/field, the transactions in question and our account balance could possibly never reconcile to our initial trial balance load. These transactions are an indication that we may have erroneous entries that need to either be tied out or corrected. Additionally, this method will prevent us from ever using the standard NetSuite Aging Reports that your system was provisioned with.
Recommended Approach
In preparation and before loading your opening balances, you should consider creating the following:
- Create a new Customer record called “Customer Balance”
- Create a new Vendor record called “Vendor Balance”
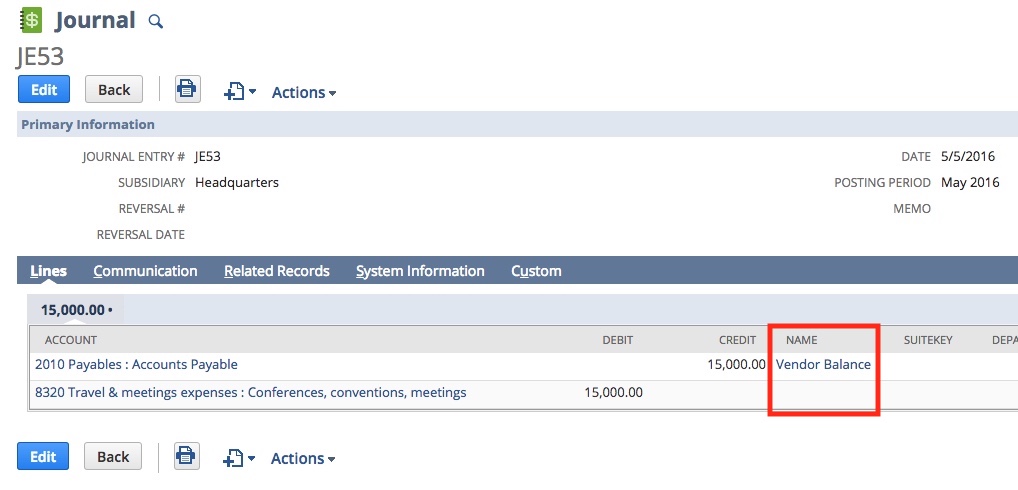
When you are preparing your balances for data loading, assign the customer “Customer Balance” to the name column/field for a Journal Entry that will impact the Accounts Receivable account. Alternatively, assign the vendor “Vendor Balance” to the name column/field for a Journal Entry that will impact the Accounts Payable account.
Note: You can also edit an existing Journal Entry by adding the “Customer Balance” or “Vendor Balance” to the name column/field provided the accounting period is still open.
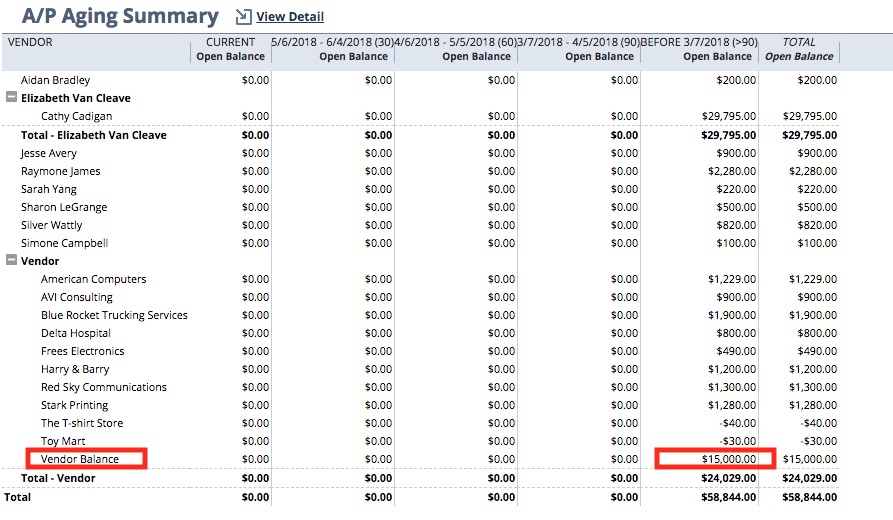
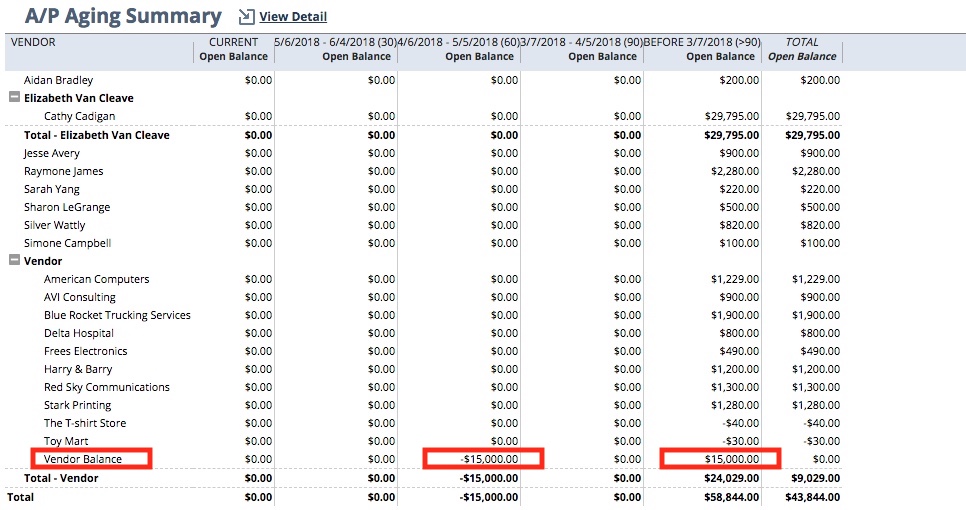
Below you will see the results of adding the vendor “Vendor Balance” to the name column/field on the Aging Report.
Next you must create a reversing Journal Entry using the opposite balances – for example, if the original entry was a Credit to Accounts Payable, then on the reversing entry, you would specify a Debit to Accounts Payable.
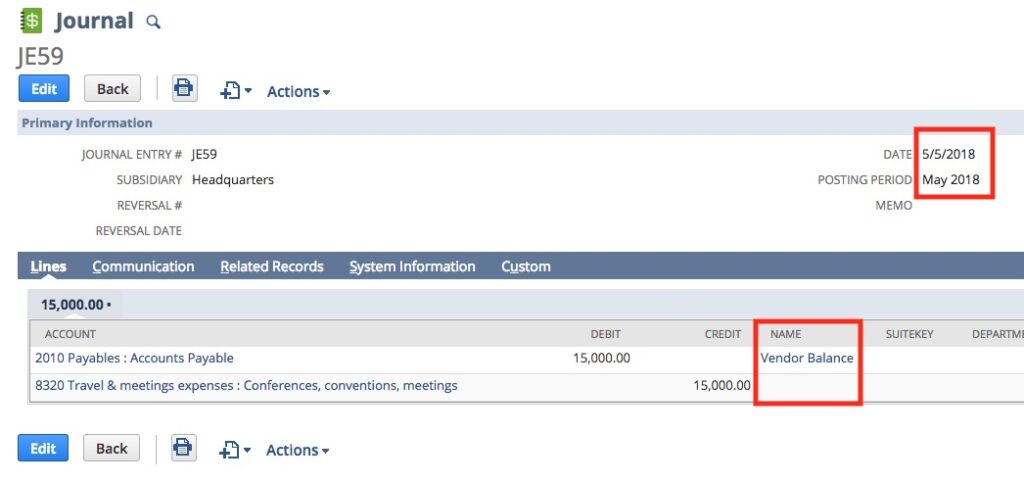
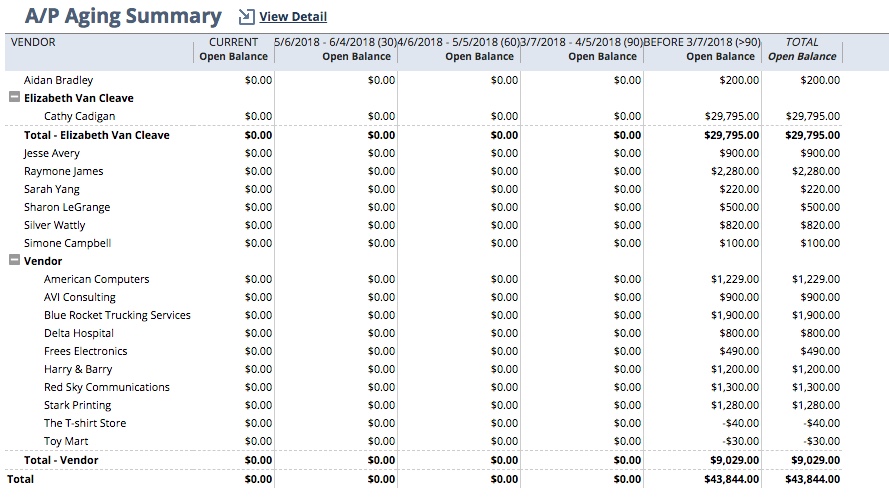
Below you will see the results of creating the reversing Journal Entry on the Aging Report.
The next step is critical as it will apply the two Journal Entries to each other and clear the outstanding balance against the “Vendor Balance” vendor record.
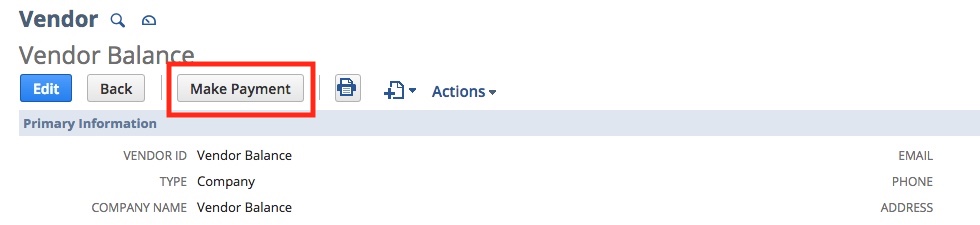
Navigate to the vendor record and click on the “Make Payment” button.
Select the two Journal Entries, and click save. This will apply the two Journal Entries against each other, canceling them out.

By following this procedure, your Aging Report will no longer show amounts for “No Customer” and/or “No Vendor” as well as “Customer Balance” and/or “Vendor Balance”
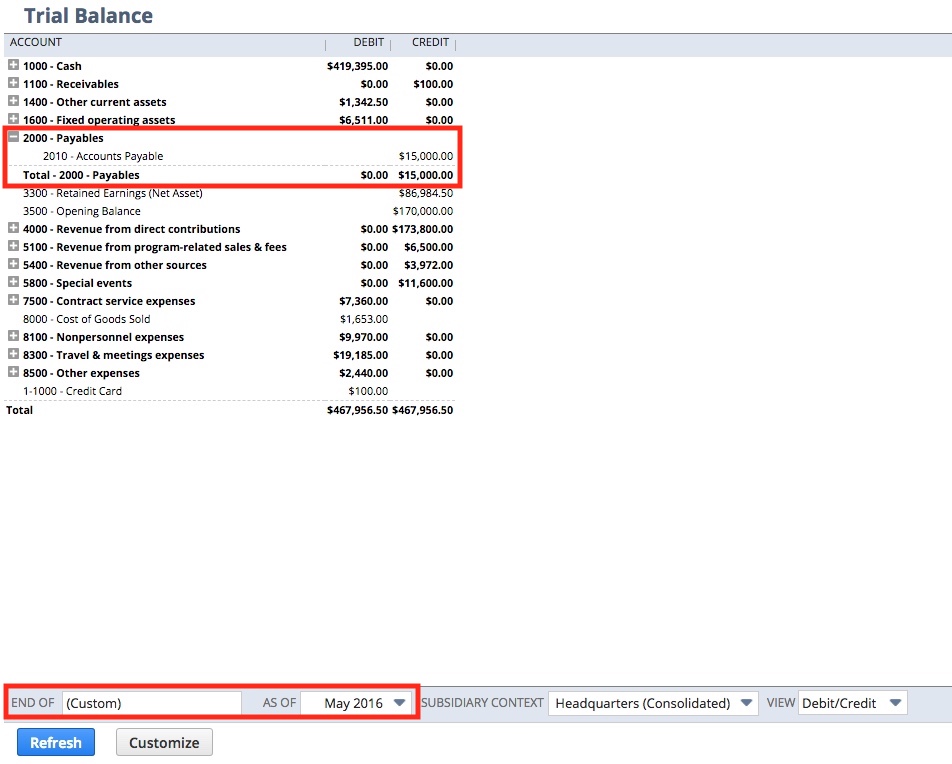
As you can see below, you will also retain the Trial Balance for the originating data load we started with at the beginning of this example.
If we can be of any assistance in adjusting your trial balance entries as shown above, or with any other area of your NetSuite environment, our NetSuite consulting team can help. We have 18 years of NetSuite experience, and more than 28 years of experience implementing ERP solutions.
Please contact us at info@67.solutions or by phone at 647-631-2528.


